I’ve been excited about creating my own weaving for a very long time. I just had a feeling that I was going to really love it. So far, that seems to be quite accurate! Since I anticipated enjoying weaving quite a bit, I opted for building my weaving loom instead of using an alternate option like weaving on a clipboard or piece of cardboard.
Building my weaving loom was just as simple as making a wooden frame, right?
Well, it wasn’t too difficult, but it definitely wasn’t as simple as—*snaps fingers*—that. I planned on following this tutorial from A Pretty Fix, but, as expected, a few things had to vary. Below I share the story of building my weaving loom. From it I hope you gather that you can build one, too!
Buying the Wood
My weaving loom was going to be pretty basic. Nothing fancy was needed. After wandering the aisles and pulling off the I-know-what-I’m-doing look, I found a 10-foot-long board that measured two inches wide (which I later learned is actually only 1.5 inches wide… ?). I want to say it was pine, but I don’t want to show off too much (or lie), so I’ll just call it wood.
I have a couple of friends who could help me saw it down to the size I needed, and I live close to the store where I bought the wood, so I figured I could just make it fit in my car for the short drive home. But I had heard they will cut down the boards for you if needed, so I sought out the closest employee to inquire about said service.
He said, “Yes, you can use the hand saw.”
But what I heard was, “You can use the table saw.” In a split second, many questions raced through my mind:
- Why haven’t I heard the saw before?
- I’ve used a table saw before but I’d be nervous to do it here!
- Should I say, ‘No, thanks.’ and walk away?
- Do I need to sign a waiver to use it?
Now, if you don’t know what a hand saw is, picture Paul Bunyan, and if you don’t know what a table saw is, think Chip Gaines. Very different. There was no way they’d let some random customer use their table saw at freewill!
 Turns out that’s right; they wouldn’t.
Because it’s a hand saw. So, after pausing like a dummy, he walked my husband and I to the back of the store and gave us the handsaw. I think my deer-in-headlights pause must have dwindled any trust that a store employee and a customer could have in the first place because apparently he thought we needed some supervision. (Note that this was after he initially just pointed to the back of the store to help ourselves to the handsaw.)
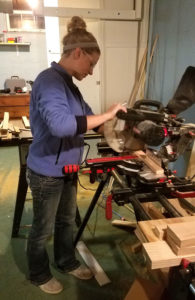
Our prior dinner date consisting of tacos and a sangria in addition to me wearing the usual Wisconsin winter layers. This was all I could think about while being hovered over as I (awkwardly) used the handsaw (on my tippy toes because the table was too tall for me). I completed two cuts, and then my husband took over. I’d like to think I let him step in before I was visibly sweating, so we’ll just go with that. He made his one cut much faster than either of mine.
Muscles will do that for you.
Long story short, use your friend’s saws. In fact, it was practically pointless to use the handsaw because A) handsaws don’t give you even pieces, not even remotely close to even pieces; and B) the 10-foot board would have easily fit in our car. But what a fun story to tell in hindsight! *tries to convince self*
Moving forward!
I contacted a friend who let me use his chop saw–yeah, there are a million types of saws–and I was able to cut down the four pieces to the desired lengths: two at 19 inches and two at 20 inches. When connected they would create a window that’s 16×20 inches big.
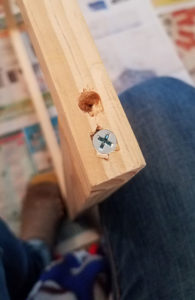
After breaking two screws, this was a moment of victory.
The size you make your loom is completely flexible; I knew I wouldn’t be creating anything larger at this point, but I still wanted the opportunity to create something fairly tall. I’m actually thinking about making a mini-loom with my leftover pieces from the 10-foot board.
My friend suggested I wood glue the pieces first to create a sturdier loom, and because he had the glue and clamps for me to use, I agreed. After keeping them up much too late, I squealed with excitement as I left their place with a beautiful wooden frame, almost ready for my creative ideas.
I do think the wood glue could be skipped if you don’t have the time or resources, although this step turned out to be a life saver for me. Keep reading…
But the hurdles continued.
I had figured the adventures of building my weaving loom were behind me. All that I had left to do was drive in some screws and pound in some nails, right? The first thing I did when I woke up the next morning (yay weekends!) was begin drilling holes into my frame to reinforce it. I don’t know how, but I managed to get the chuck stuck–see? I’m learning lots!–on my power drill. YouTube told me all sorts of crazy things, including sawing it off. Too soon, YouTube. Too soon. (Also, what?!)
Find friends who dream with you (…or make them physically happen).
Jake, my husband, was out of town and I was soooo close to being able to weave on my loom, but it was 9am on a Saturday, and the same friends I was about to call are the same ones I kept up late just hours (it was at least 10!) before. Awesome as they are, they let me come back over. All that my power drill needed was–you guessed it–some muscle.
Happy as a clam and ever-so-thankful, I came home and kept drilling. After using a drill bit to create the first hole in the first corner, I attempted to drive in my first screw.
Snap!
It broke so easily. Drill bit must have been too small, so I went up a size. The first screw definitely didn’t reach the second piece of wood, so this next screw was going to have to do all of the work in this corner. (Thankful for that wood glue right about now!)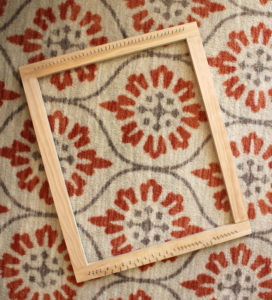
Snap!
It happened again! At least this time the screw made it to the second piece of wood. Thankfully, that was my last screw to break, but you can bet that I did a whole lot of trial and error to overcome this issue. A few of the the next six screws were a bit shaky, but I totally improved from the first attempt. *pat on the back*
Pounding in 82 nails took more time than I desired; once I was finished I realized I could have used a drill bit to prep for the nails. Drilling before pounding in the nails probably would have also saved my wood from starting to crack, which is why the nails aren’t in a straight line on one side. But I reasoned that the loom didn’t need to look good, as long as my weaving did!
I overcame some fears while building my weaving loom!
A handful of things intimidated me prior to this project:
- Shopping for wood. Have you seen the big aisles and the hundreds of sizes and types of wood? Each time I do it, I feel a little bit less out of place.
- Figuring out how to buy the wood and transport it home. It’s awkward enough walking around the store carrying a super long board of wood, but now I know that it’s even worse using their handsaw in front of the employees.
- Using my friend’s saw. I wasn’t intimidated by this, but it was great to get that first-time-use out of the way for perhaps future projects. (Pretty please, friend?)
- Semi-spontaneously building something on a whim. I know I’ve been planning this, but there’s only so much that I really could have planned. Actually going through the process is always different and I now have more confidence than I did before.
- Actually starting my weaving. This was a bit intimidating simply because I had never done it before. I didn’t feel well-informed, so I just jumped in and made it up as I went. I learned so much by doing this.
I’m thankful for this process because there were some things that made me a bit nervous prior to building my weaving loom, but I feel much more confident about doing them now that I’ve gone through them again.
I encourage you to just. start.
Sometimes things are most scary because they’re unknown, not because they are difficult. The Heartward Project puts you into motion, forcing you to get past the barriers that don’t need to be holding you back. You will be taken on some wild rides, but that’s what makes this whole process exciting!
If you’d like access to some awesome freebies designed to help you organize your creative journey, sign up for my email newsletter! You’ll get access to exclusive content and freebies, only available to those on my list!
In the meantime, comment below something you’ve accomplished lately that you’re proud of!
Related: Exploring the Art of Weaving | 2017: My Most Creative Year Yet