Lovely quotes displayed in effortlessly beautiful hand lettering…you know what I’m talking about. They’re everywhere. They adorn our walls. We scroll past them in our social media feeds. Heck, they’re even being used against our will power in advertisements! It’s no wonder that people everywhere are teaching courses on hand lettering as well as sharing their favorite tools. (You know, the ones that you buy and you miraculously have beautiful hand lettering?) Well, from one beginner to another, I’m here to share my 4 key observations that will help you define your hand lettering style.
Style? Isn’t it all the same?
At a passing glance, you may simply just see hand lettering. But as you study it more closely, you begin to see hand lettering; exquisitely unique, speaks-true-to-character hand lettering. Each line, a purpose; each composition, intentional. By observing how and when and where and why letters connect the way that they do, you too can start to unmask your style.
My pen barely leaves the page’s surface in my every-day handwriting, but when it comes to hand lettering, I consider myself to be a beginner. And from one beginner to another, this girl can only take in so many examples before having to try it for herself.
But now where does my pen go?
I’ve always been able to draw something well if I’m able to look at the object or a picture, but I struggle to creatively think up something unique that I haven’t seen before. Thankfully, this is where the saturation of hand lettered quotes everywhere helps me out: almost nothing but the inspiration sticks!
Think about it. Can you picture a single hand-lettered quote right now, including every detail? Maybe it’s just me, but nothing specific comes to mind. Although, the idea of it is very familiar. I know that the letters swoop, there are swirls to add elegant details, and the words with more impact are written with a stronger emphasis.
This is true inspiration.
When you are moved to try something but you can’t (and shouldn’t) copy-cat it directly. You’re required to use the idea of something and creatively make it come to life with your own flavor. The faint memory should be embraced as a guideline, and you should feel out how you naturally want to write some of those letters.
Sometimes I’ll come across a beautifully hand-lettered something and just stop and observe. How do the letters come together? Are they swoopy or narrow? Upper or lowercase? The questions go on! If I ever mimic something, it is quite typically just a connection between two letters, and is purely used to gain understanding. I don’t sit there and trace something, or adjust my lines until it resembles the example; that’s not authentic. It’s not me.
So, what has this taught me?
During this time I found I really don’t want to be great at calligraphy, at least not yet. What I’m really eager to do right now is discover my own style. When I want something written in nice letters, I want to already have an idea of what it’s going to look like. By studying how others form their letters, I have exposed 4 key observations that will help you find your own style, from one beginner to another.
So let’s. get. to it.
Key Observation #1: Are we connecting yet?
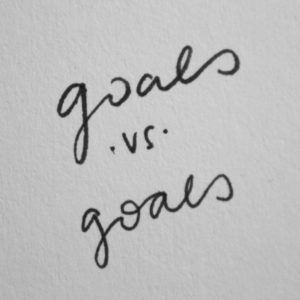
You may have never noticed this before, but not always do your letters have to connect. When I first noticed this, I was relieved! I was struggling to connect an “o” to the letter that followed because it feels so unnatural for me. (Compare the top “goals” which is my normal hand writing to the bottom “goals” where I force the connection.) If this is also your natural tendency, embrace it! Force nothing when it comes to hand lettering.
Key Observation #2: What do I do with the tail?
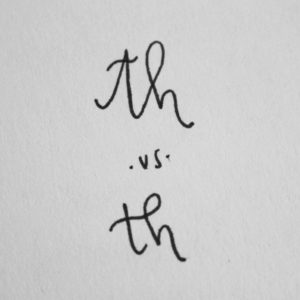
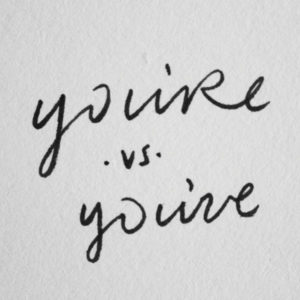
This might be one of the most noticeable elements of hand lettering: are the tails big and swoopy or formally narrow? Does the tail finish curving upwards or bending down into the following letter? This key observation also includes how a line leads into a letter, as seen in the letter “h” example. The “yellow” example demonstrates how a tail can be used to dress up your composition. Note that the tail of a letter is formally called a descender.


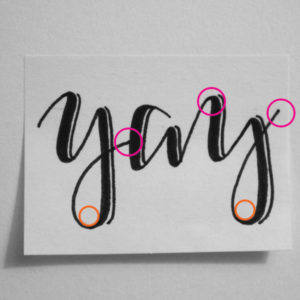
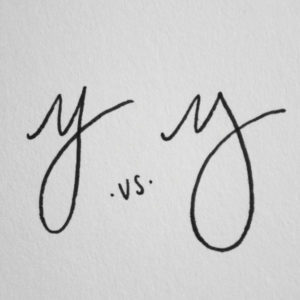
The “yay” picture was written by me quite a while ago and is a great example of why consistency with the tail is important! The pink circles highlight where the tail ends and how it leads into the following letter. You can see that I lacked consistency with that. The orange circles help to show how the swoops impact where the line ends up. Note how the swoop of the first “y” is more round and ends lower than in comparison to the last “y”.
Key Observation #3: To hug or not to hug?
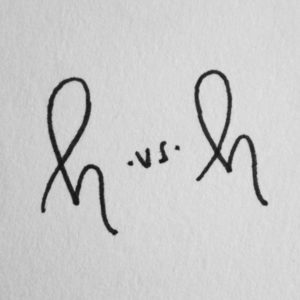
This key observation is really all about how close your up-and-down lines sit next to each other. In the “y” image below, check out where the tail begins. Do you trace the “up line” when you draw your “down line” or do you create a gap? This can be applied in so many places throughout your letters! You can inverse this and put a gap between the stem of the letters “m” and “n” as well. I naturally favor the gap in my writing, so I try to play it up with bigger swoops heading out and away from the letter, as seen in the second “y”. (Again, this can be with an “m” or “n” as well, just going up instead of down!)
Key Observation #4: You can get with this, or you can get with that.
Something you can make unique to your own writing is how you choose to write your letters. Just like my “o”s that I mentioned before, I also struggle to make a “pretty” lowercase “r”. My “r” naturally wants to be capitalized, so why not embrace that and make it part of my style? Now, I’m not saying to alternate each letter between capital and lowercase, but the more unique you can create your overall writing, the more noticed you’ll be. It’s all about finding what naturally works best for you.
-
My “R” is much more readable (and unique) than the regular cursive “r”.
-
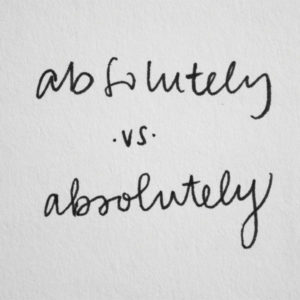
The “s” is most noticeably different, but also look at how the line breaks multiple times in the top example (which is my natural writing!).
Which of these 4 Key Observations for the hand lettering beginner stood out to you? Leave a comment!
Related: Exploring the Art of Hand Lettering | 2017: My Most Creative Year Yet